
Selecciona el idioma y la moneda con los que deseas navegar

Selecciona el idioma y la moneda con los que deseas navegar
eSIM Installation and Activation Guide
Brand:

Apple
Make sure you have a stable internet connection before starting the installation, ideally using a Wi-Fi network or a strong 4G/5G signal.
Before traveling (installation):
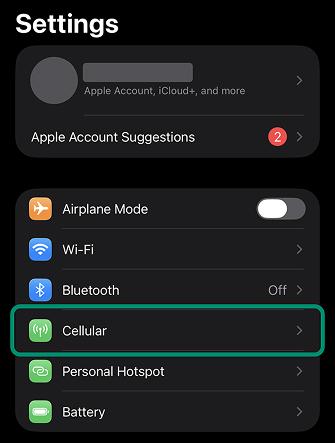
Open 'settings' in your device
In the settings, select the 'Cellular' option.
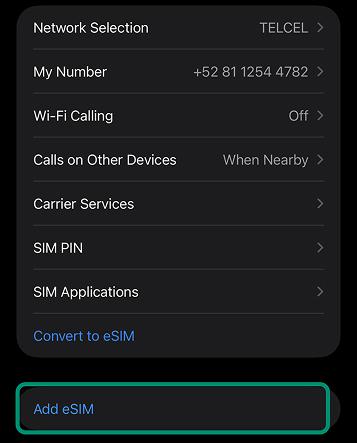
Add your eSIM
In 'Cellular', tap the 'Add eSIM' option and then select 'Use QR Code.'
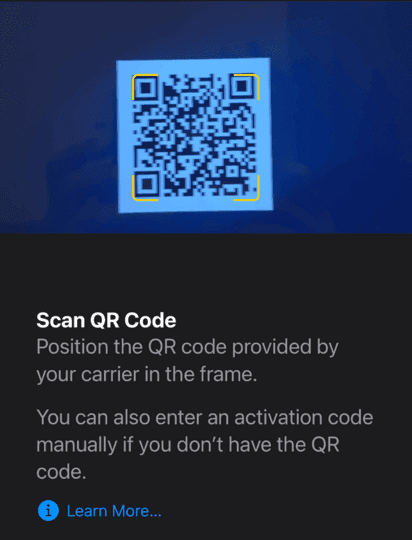
Scan the QR code you received via email
Once the QR code has been scanned, wait for the eSIM to install.
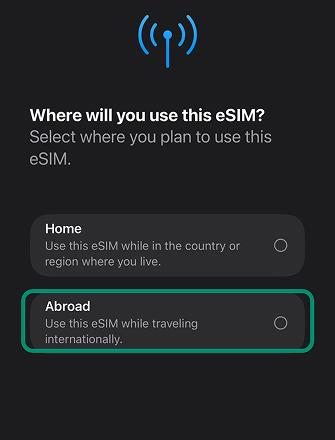
Select "While abroad"
During the installation process, you will be asked where you plan to use your eSIM.
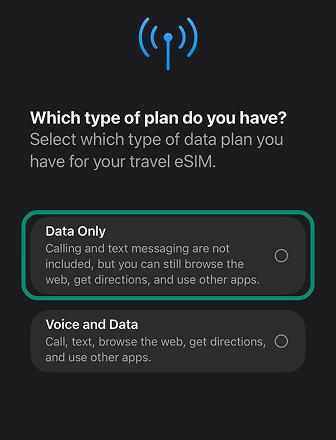
Select "Data only"
Travel eSIMs are for data only. They do not come with an assigned phone number.

Turn off your eSIM before traveling
If you're not at your destination yet, make sure your 'Travel' eSIM is 'Off' and the Primary SIM is 'On'.

How to toggle a line or eSIM
Select the desired SIM and toggle the 'Turn On This Line' button.
Upon arriving at your destination (activation):
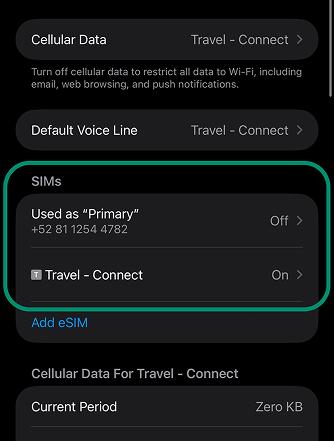
Turn off your Primary SIM and turn on your Travel eSIM
In the 'Cellular' menu, turn off your primary SIM and turn on your travel eSIM.
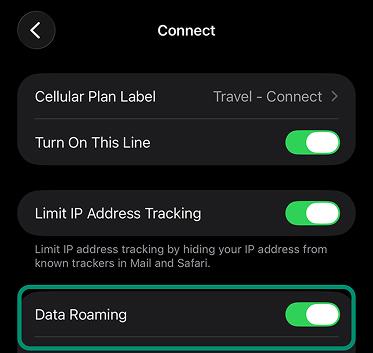
Turn on 'Data Roaming' for your travel eSIM IMPORTANT!
Once your travel eSIM is active, make sure to enable 'Data Roaming' in its settings to allow for a network connection.
Additional notes

Once you're at your destination, the 'Cellular Data' setting should be assigned to the DatosdeViaje eSIM. Your 'Primary SIM' should appear as 'Off', and the 'Travel' SIM should be 'On'.
After your trip
Make sure to deactivate or remove the eSIM.
We recommend to not remove your eSIM so you can top it up for your next trip, avoiding the need to install another eSIM.
If you still wish to remove it, simply go to the 'Cellular' menu, select the Secondary SIM, and choose 'Delete eSIM'.
How to top-up your eSIM if you run out of data
If you registered an account with us:
If you did not register an account with us:
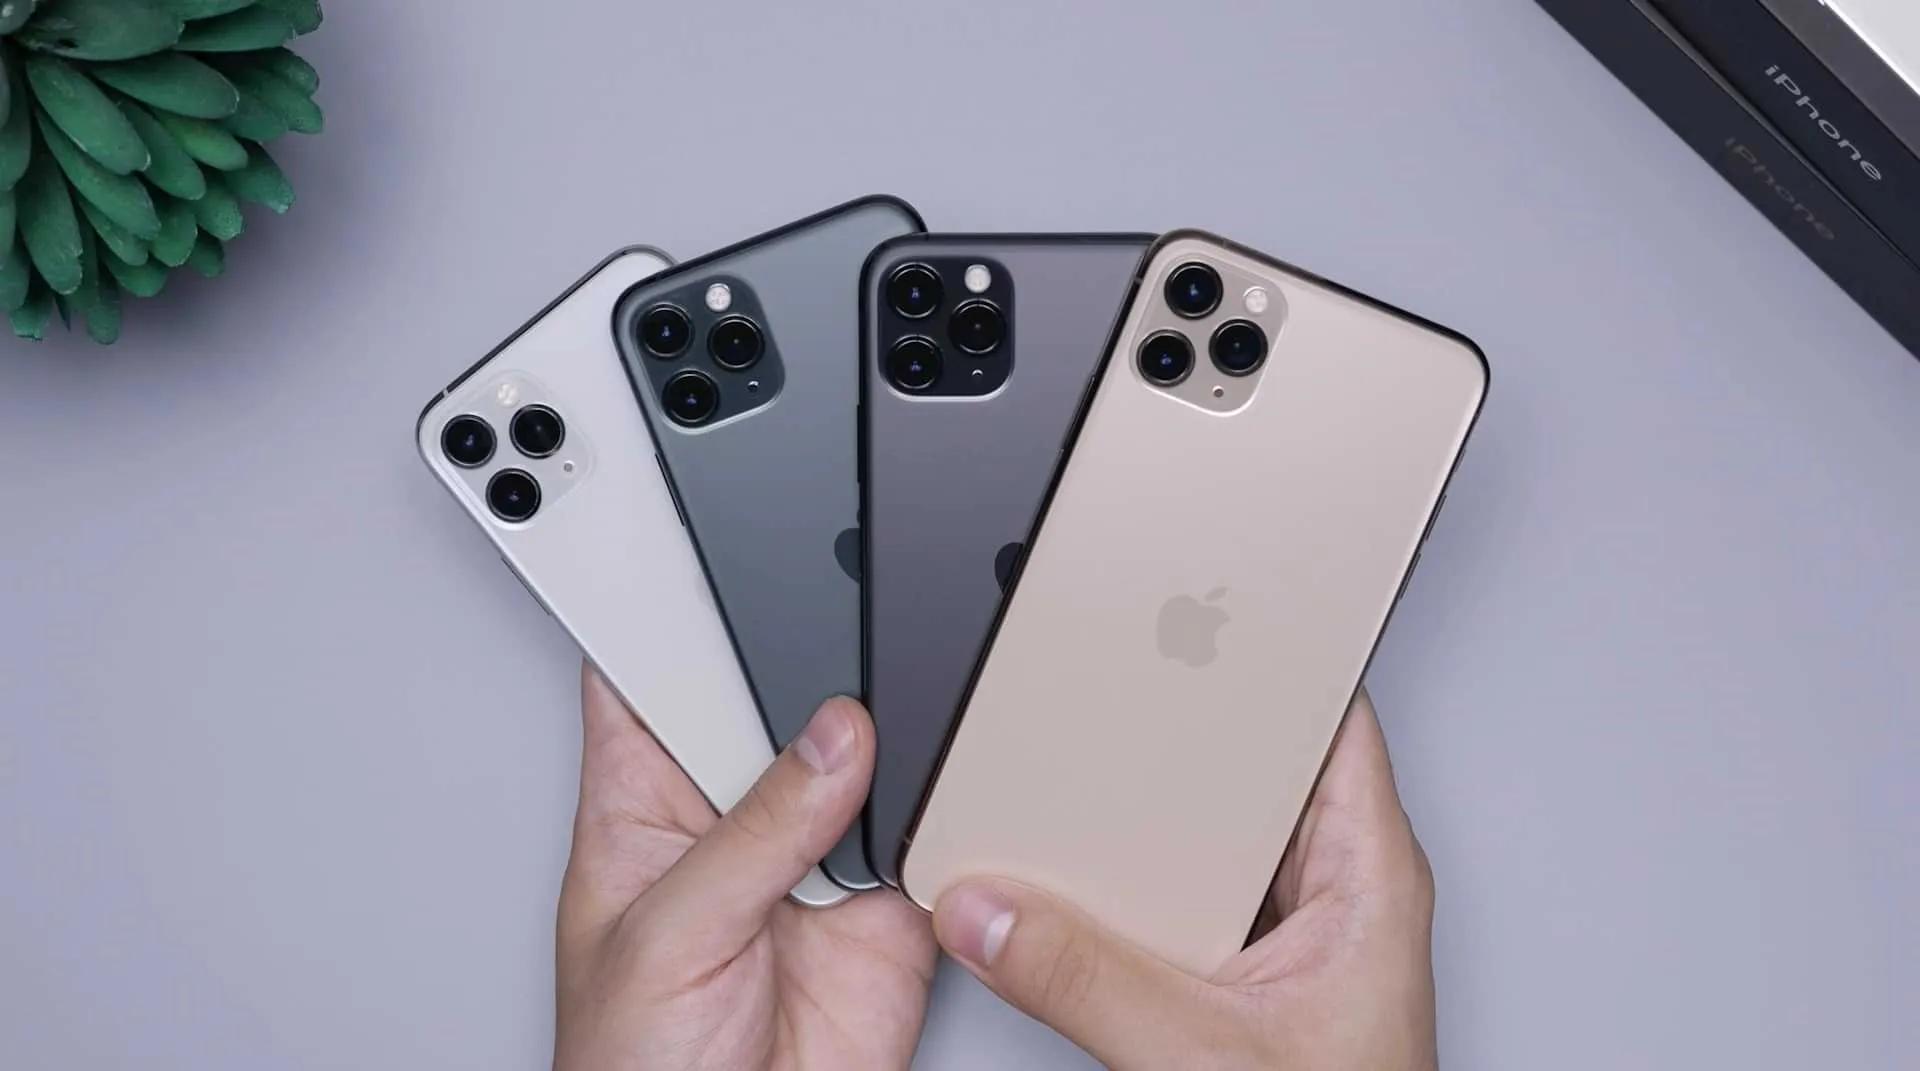
Teléfonos Compatibles Apple
iPhone Air
iPhone 17
iPhone 16
iPhone 15
iPhone 14
iPhone 13
iPhone 12
iPhone 11
iPhone XS
iPhone XR (2018)
iPhone SE
¿Buscas las instrucciones de otra marca?


Creado por personas que aman explorar.
Copyright © 2024 DatosdeViaje ® Todos los derechos reservados.

Usamos cookies para ofrecerte un mejor servicio y experiencia. Para más información, visita nuestra política de cookies.


